

Black and White Cookies
Black and White cookies are exactly what I crave when my schedule is overwhelmed and I just need 5 minutes to stand outside my office, watch the city traffic and marvel at how the streets of New York can lift my spirits. And a little bit of flour, butter and sugar never hurts, either. Biting into that soft cakey texture with just enough icing makes me feel like I’m both enjoying something slightly sophisticated yet simple enough to be comforting. There’s a reason they are a staple in bodegas at all hours of the day- they’re special, but not exclusive. They’re my kind of cookie from my kind of city.
This is a user-friendly recipe. I have decreased the sugar in the icing because it is so.cloyingly.sweet without the cookie base, but if you find it too runny to get a good coat on each half of your cookie, mix in a little more 10x sugar until it reaches your desired consistency.
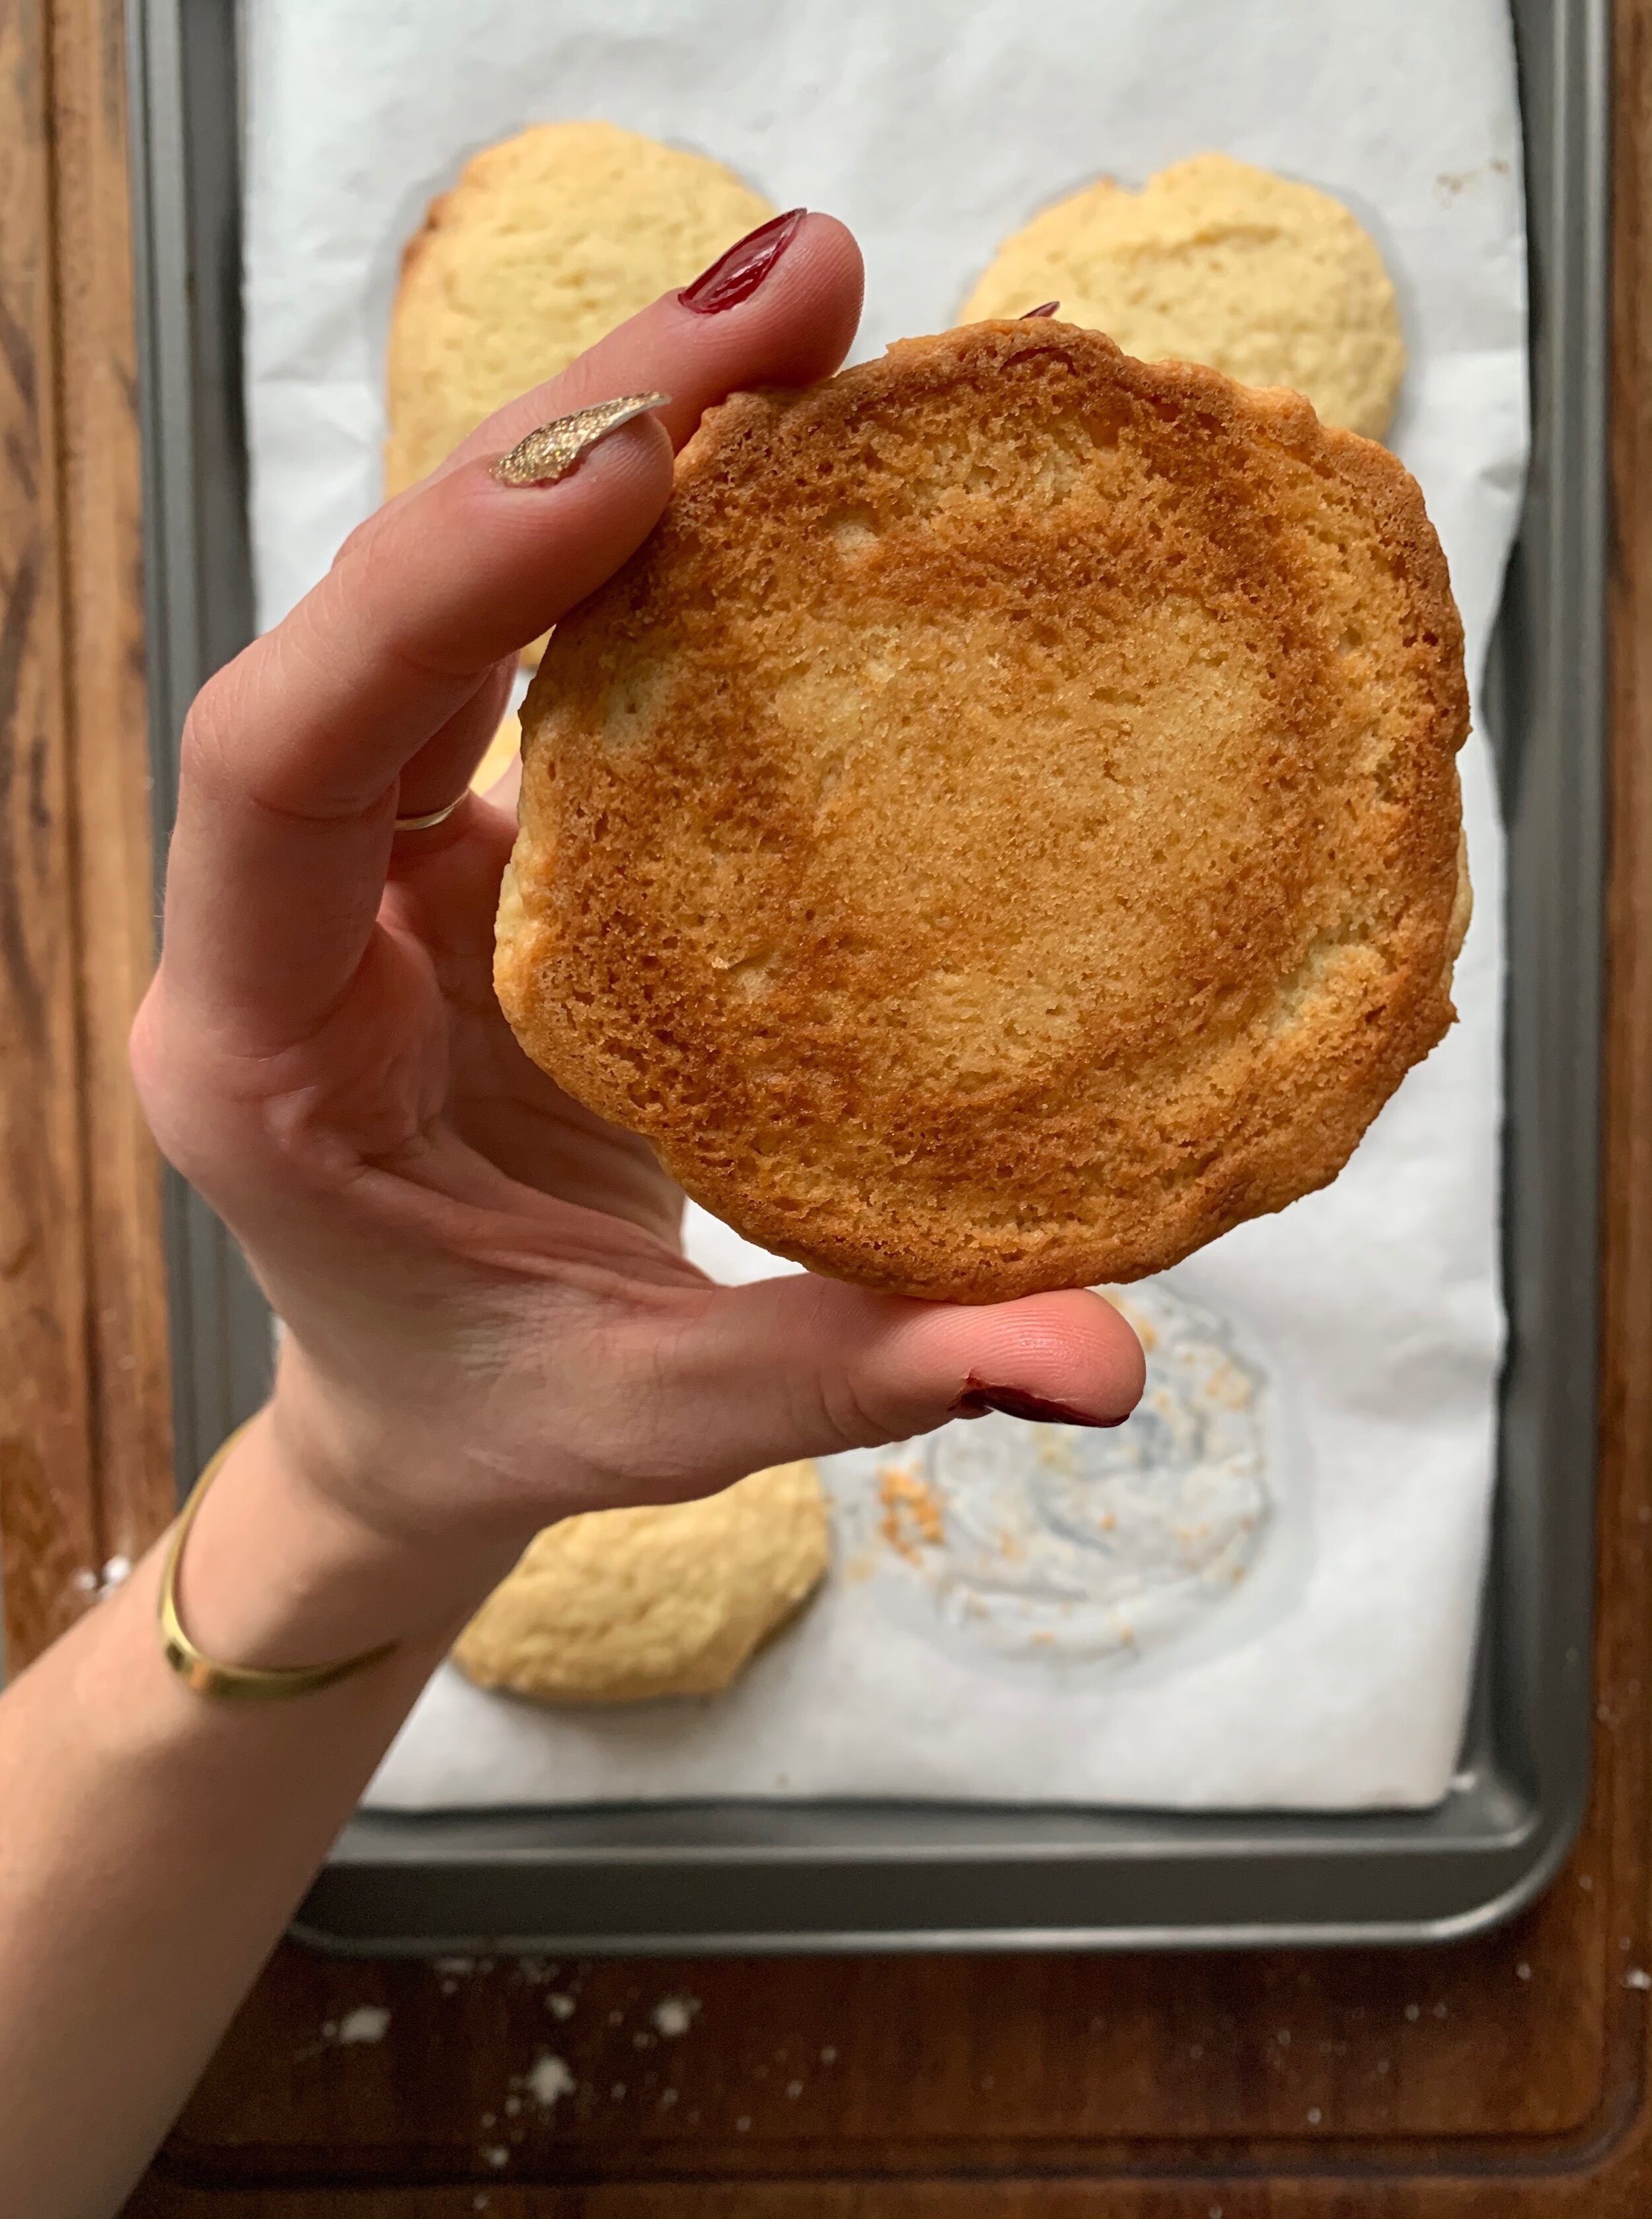
Icing a cookie upside-down may throw you for a loop, but the cookie base is simple enough for tiny kitchen helpers. These cookies do need some room on the baking pan to dome up but the dough can be measured with a large spoon or ¼ measuring cup and dropped onto the parchment paper. You’ll feel like you’re working with thick cookie/cake batter…because you are!
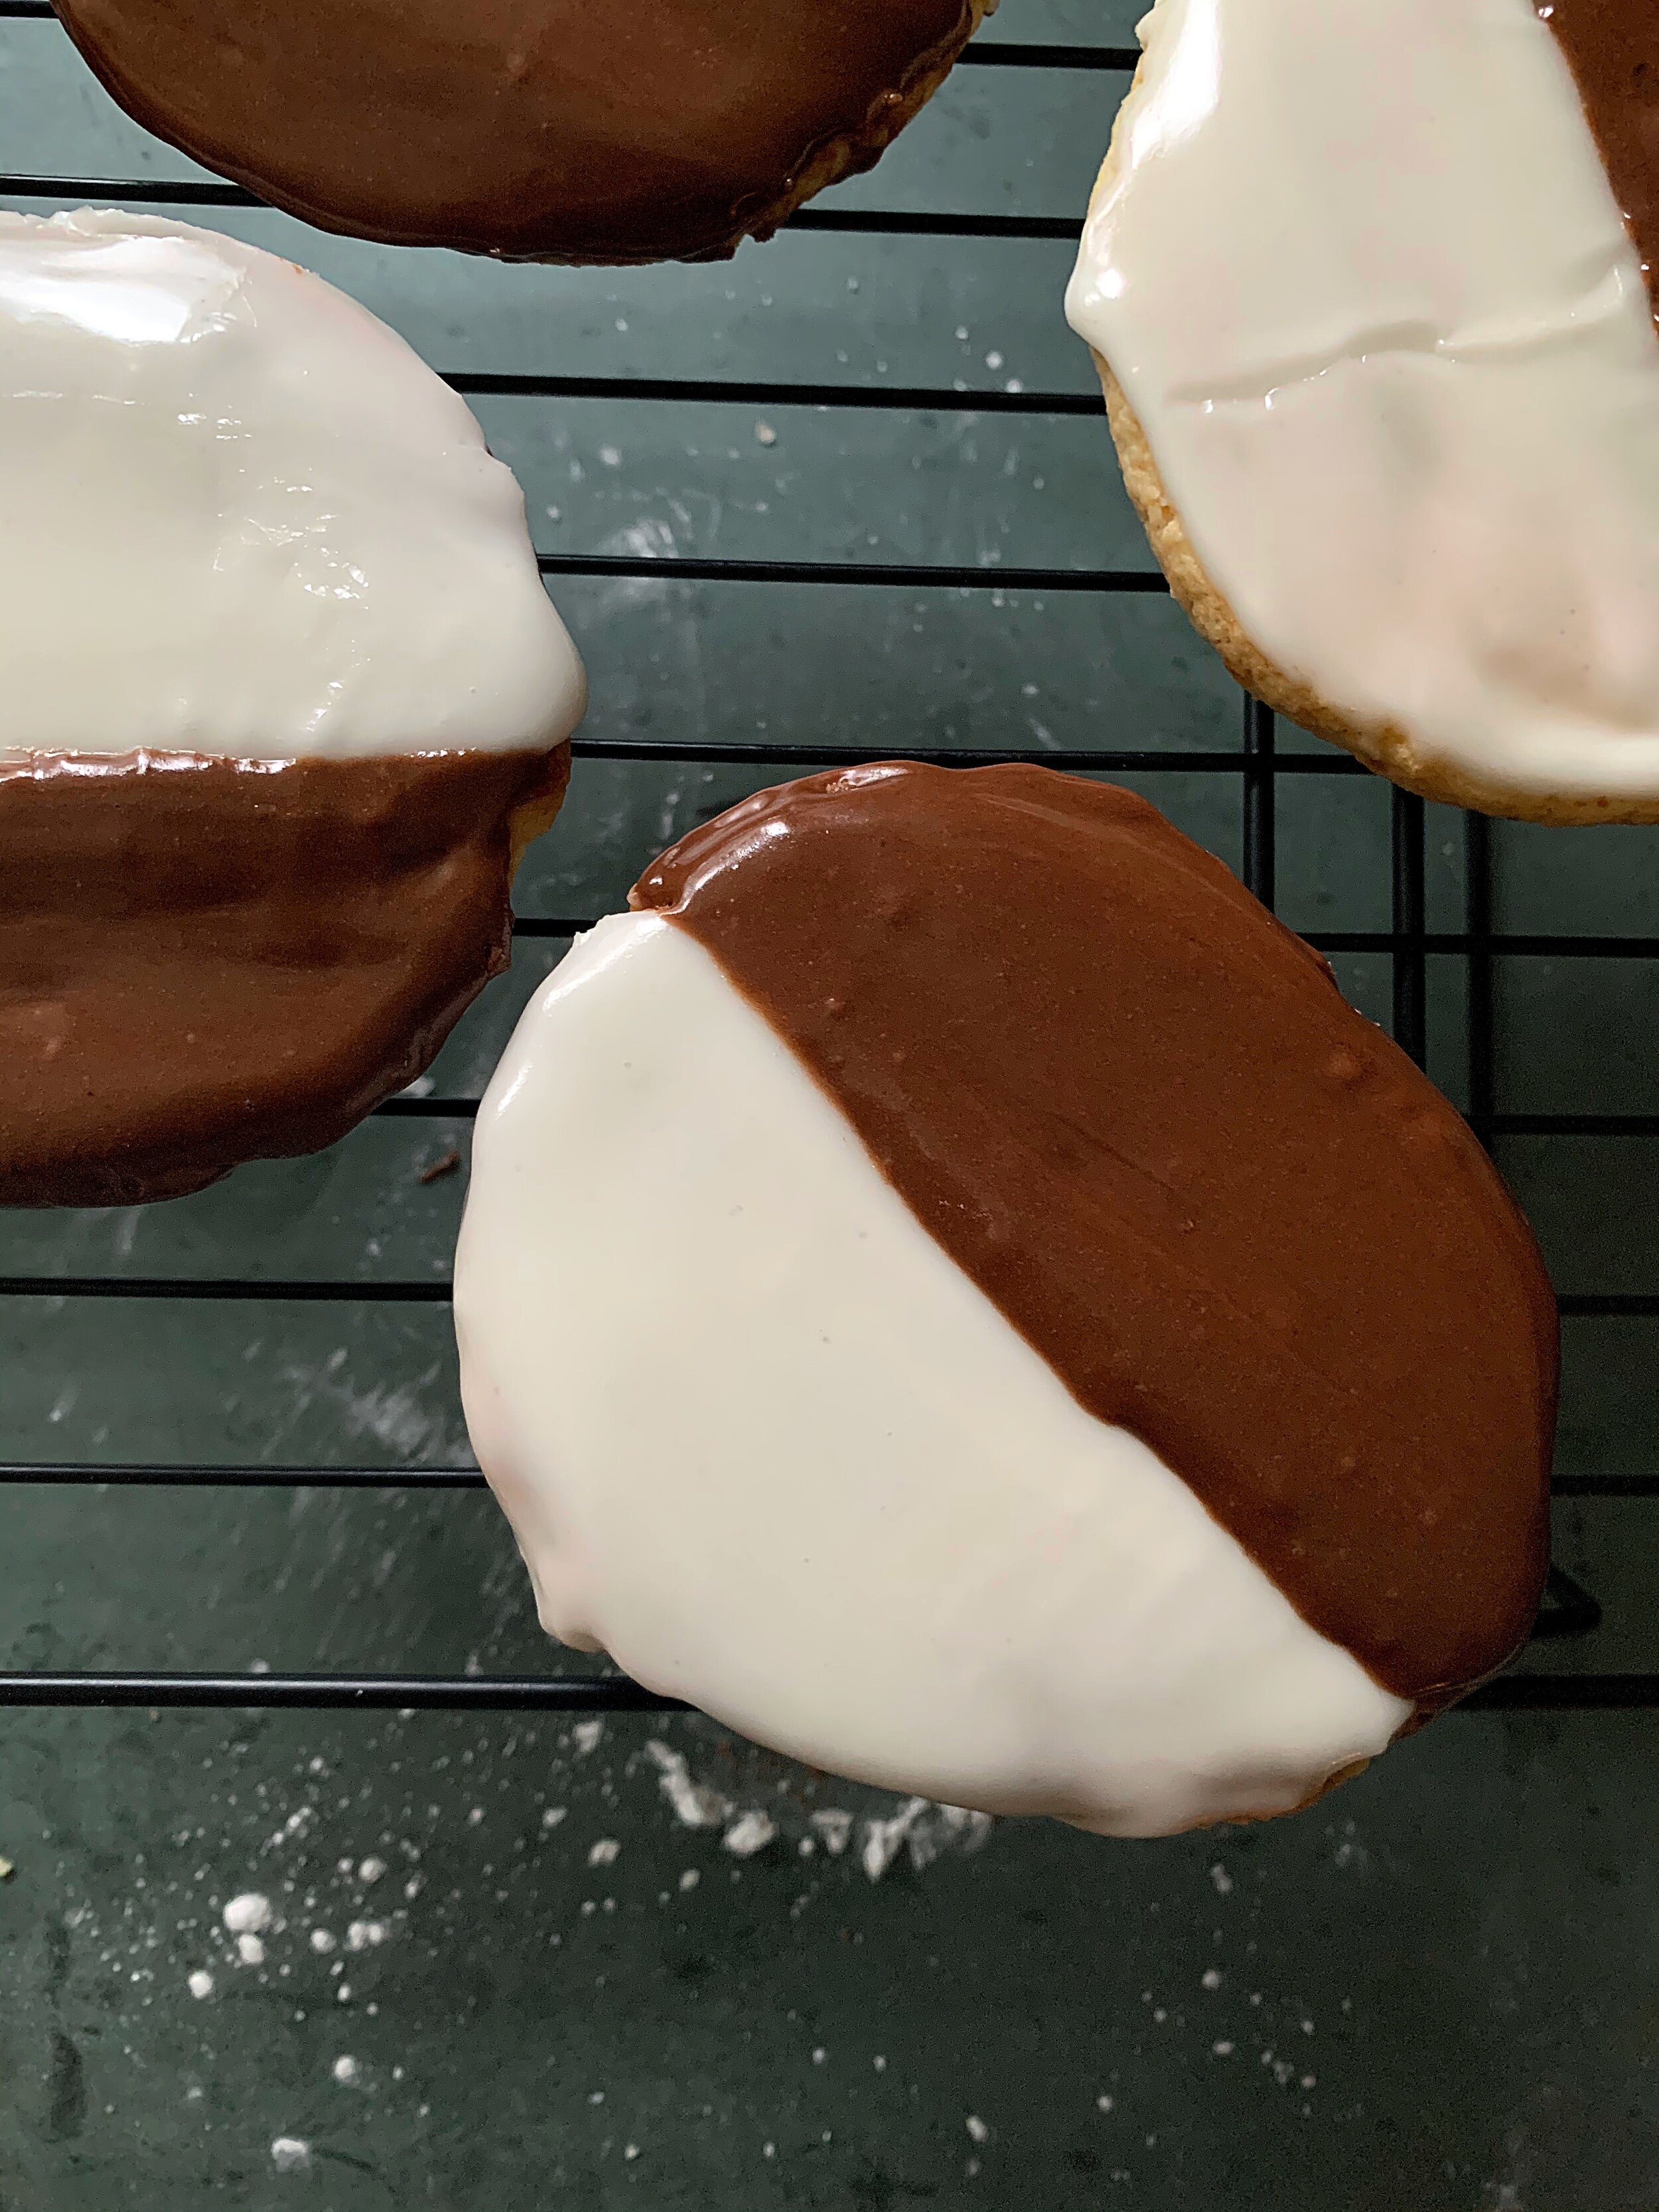
After cooling on a rack for 10 minutes, flip your cookies UPSIDE DOWN and cover one half with your vanilla icing (like you’re filling in a perfect half-moon), let dry, and then cover the other side with your chocolate icing. I suggest using a silicone spatula that’s at least 2 inches wide and loading a healthy amount of icing onto your spatula for that first swipe- don’t be scared! Start at the top and smear an even layer down one half of the cookie. Make sure to get the top, bottom and sides- you can go back and add more if you didn’t quite get enough the first time.

DO NOT RUSH the drying time between your vanilla and chocolate icings and definitely do not rush your drying time at the end- the icing should no longer be wet or sticky. Remember, these cookies are typically wrapped in cling film and sold individually at NYC bodegas, so the icing needs to be dry!

Both icings start from the same base- you will later measure out half into a separate bowl, add your cocoa powder and your extra tablespoon of milk, and that will become your chocolate icing.
Black and White Cookies are generous in size, host the two most iconic flavors ever* and feel special without being too fussy. Just like New York City!

Black and White Cookies
Cookie batter:
1 + ¾ cups AP (all-purpose) flour
½ teaspoon baking powder
¼ teaspoon baking soda
¼ teaspoon salt
10 tablespoons room temperature unsalted butter
1 cup sugar
1 room temperature egg
4 teaspoons vanilla extract
⅓ cup sour cream
Icing:
4 cups 10x (confectioner’s) sugar
6 + 1 tablespoons milk, divided
2 tablespoons light corn syrup
2 teaspoons vanilla
½ teaspoon salt
3 tablespoons unsweetened cocoa powder

Preheat your oven to 350°F. Line 2 baking sheets with parchment paper or use silicone baking mats.
Stir your flour, baking powder, baking soda, and salt together in a medium bowl.
Using your stand mixer, beat your butter and sugar on medium-high for about 2 minutes until your mixture is smooth and creamy. Add your egg and vanilla extract. Continue to beat on high speed for about a minute or until combined. Scrape down the sides and the bottom of your bowl and mix again for a smooth, even texture. Reduce your speed to low and alternate adding ⅓ of your dry ingredients with ⅓ of your sour cream. Mix on low speed and scrape your bowl one or two more times to ensure there are no pockets of flour on the sides or bottom of your bowl.

This dough is thick and sticky! Use a high-quality non-stick spray to grease an oversized spoon or ¼ measuring cup. Measure your dough with your greased spoon or cup and drop onto your baking sheet so that they are about 4 inches apart. Bake for 16-18 minutes or until the edges are just lightly browned. Let the cookies cool for 5 minutes on the baking sheet and then let cool for another 10-15 minutes on your cooling racks. Your icing will melt if you spread it on while your cookies are hot.
Making your icing: whisk your 10x sugar, 6 tablespoons of your milk, corn syrup, vanilla extract and salt together in a medium bowl. Confectioner’s sugar (10x sugar) likes to fly out of mixing bowls so plan accordingly. Pour approximately half of this icing base to another bowl and that will become your chocolate icing. In only one icing bowl, mix in your cocoa powder and remaining tablespoon of milk- now you have the black and white icings!

When your cookies have cooled, take them one at a time in your hand and hold so that the flat side is facing up- this will be your icing side. You will apply just the vanilla icing to half of the cookie, stopping in the middle of the North-South line. Taking a large smear of vanilla icing, run your silicone spatula down the middle, making sure to cover the top, bottom and edges.

When you have finished icing the vanilla halves, place back on your cooled baking pan and refrigerate for about 15 minutes or for 30+ minutes at room temperature, until the icing has set and is no longer shiny, . It may even look crinkly as it is drying. Do not skip this step or your icing lines will be mudded instead of crisp. Once the vanilla icing has set, spread your chocolate icing onto the other half of the cookie’s flat side and let dry for about 1 hour (if you can be this patient!).
Store at room temperature in an airtight container or wrap in cling film to enjoy on-the-go!
Enjoy, Foodfam!

I need to work on covering all of the edges before I move onto the next icing. These are semi-dry and are too wet and shiny to be wrapped quite yet, but they are perfectly delicious for taste-testing!
*This is my personal opinion, but I invite you to disagree if you can back it up with some tasty evidence!